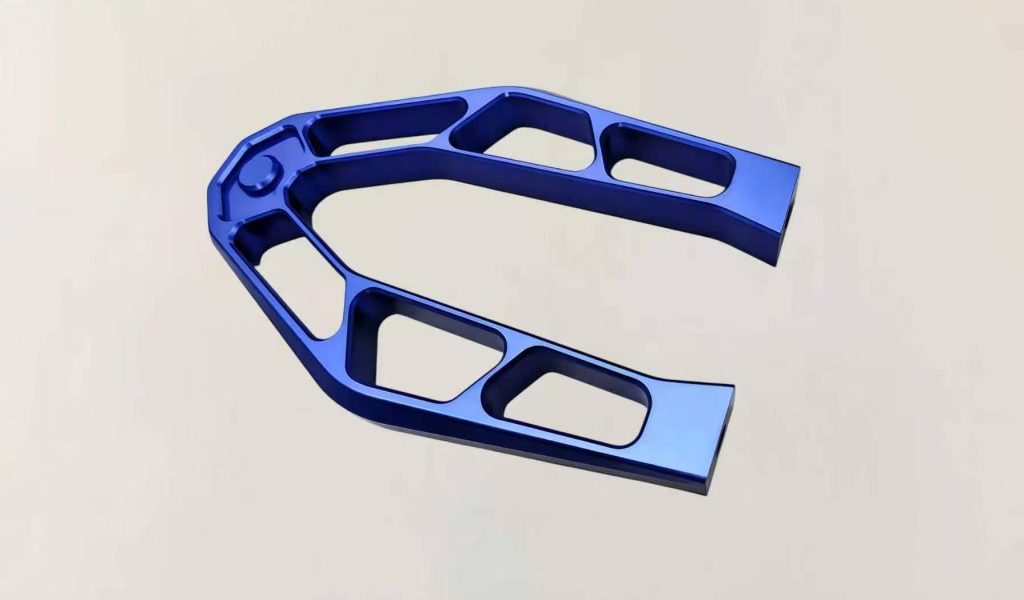
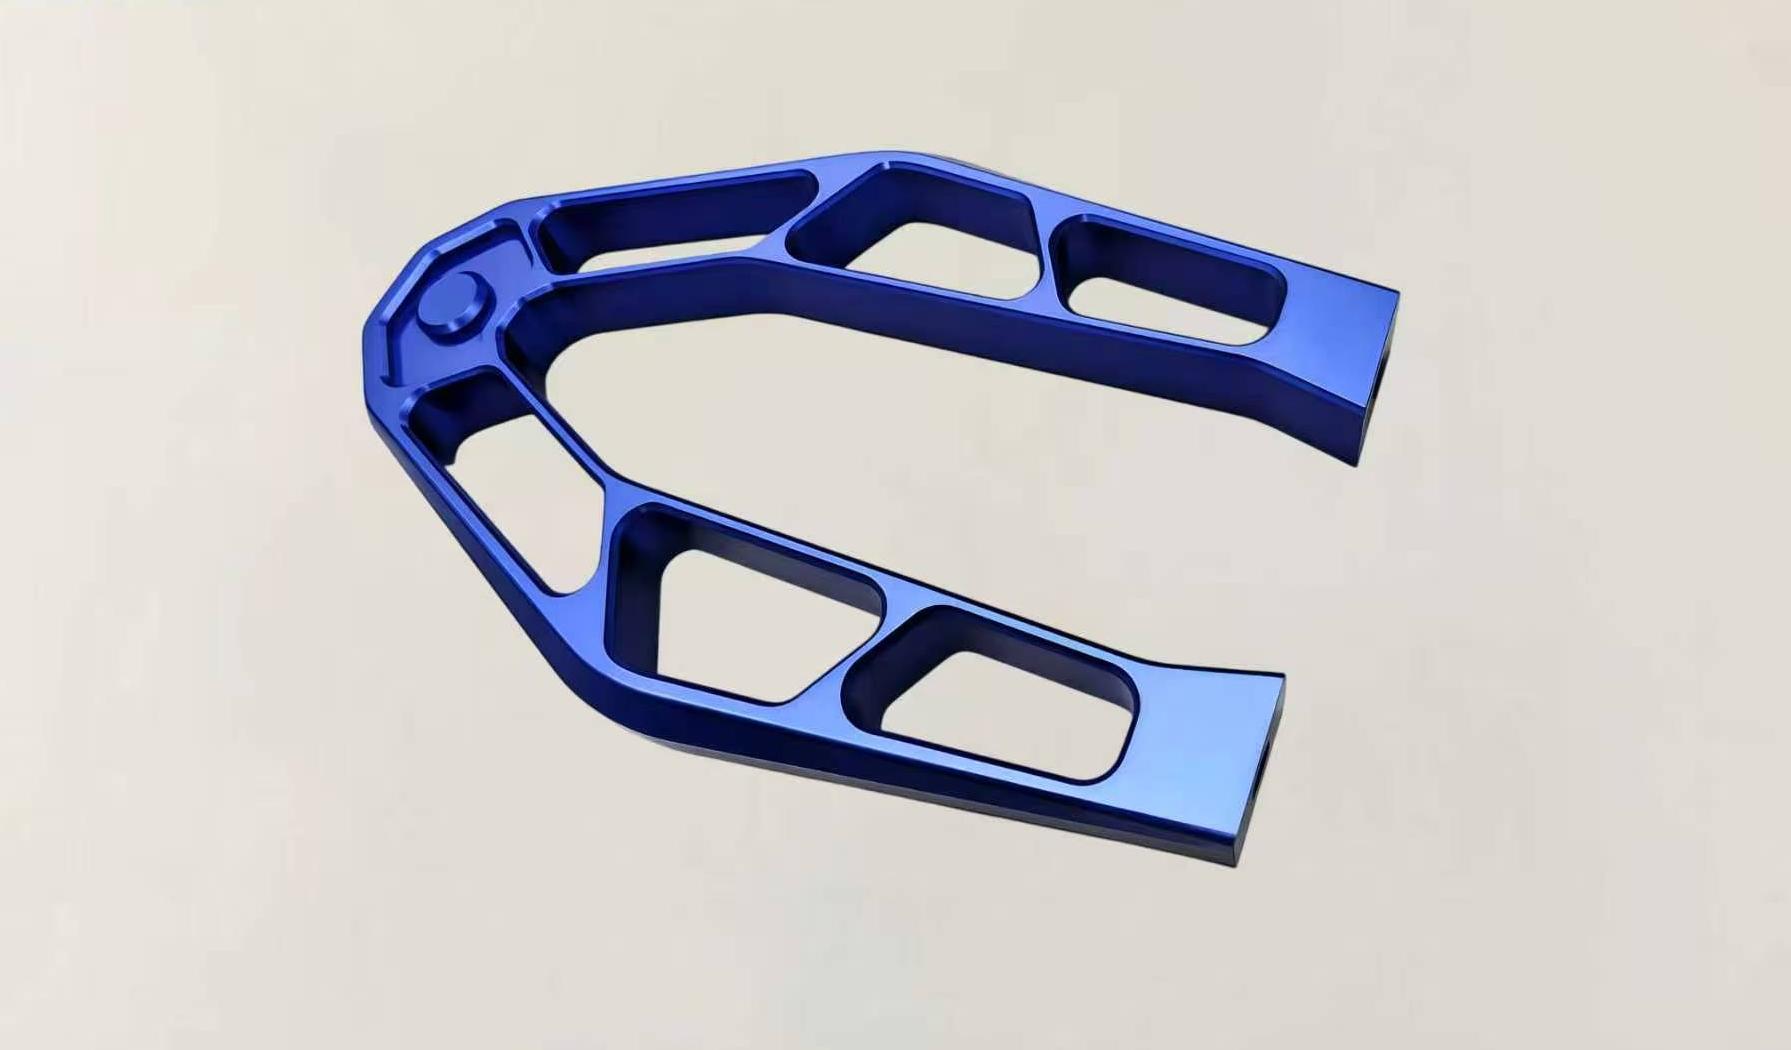
CNC Machined Bionic Lightweight Swing Arm
- Material: AL6061
- Size: 15.875X179.222X112.572 mm
- Process: CNC Machining
- Surface treatment: Blue Anodizing
This is a bionic-style lightweight swing arm (link). It has a U-shaped forked structure with a large number of lattice-style lightening pockets. The two ends are assembly connection heads, with a locating boss in the middle. The whole part is milled in one piece on a CNC machine and finished with blue anodizing.
It is a structural link for moving assemblies. The mounting holes and datum faces at both ends carry true position and parallelism requirements, and the design has to balance low weight against structural strength.
Machining Challenges
- Many lattice cutouts and thin ribs leave the part with low overall rigidity. It chatters easily during cutting, and the ribs are prone to tool vibration and distortion.
- The U-shaped fork has two symmetrical arms. Locating the part when flipping it is difficult, and the holes at the two ends can drift out of symmetry.
- A large amount of material is removed, and cutting stress concentrates in the thin ribs. After the stress releases, the arm can twist or bend.
- Several internal corners are very small, so step marks are hard to control with small tools. Blue anodizing is highly sensitive to tool marks, and cosmetic consistency requirements are strict.
- As a moving arm, the parallelism of the end datums and the hole-to-hole distance are tightly toleranced. Any distortion directly affects how smoothly the mechanism moves.
How It’s Managed
| Issue | Approach |
| Internal stress and overall distortion | Layered roughing with even stock left on; stress relief after roughing so the part stabilizes before finishing |
| Symmetry and locating | Dedicated fixture, with most of the profile completed in one setup where possible; symmetry checked after machining to control the geometric tolerance between the two arms |
| Step marks and surface quality | High-polish aluminum tooling with climb milling at high speed and shallow depth of cut; arc lead-in and lead-out at corners to remove step marks; temporary ribs added in weak areas and removed last |
| Operation order | Datums first, then the lightening pockets, and finally the end assembly holes, so later cuts do not disturb the datums |
| Inspection around anodizing | Surface roughness tightly controlled before anodizing; hole spacing and parallelism re-checked afterward to protect the assembly accuracy of the moving joint |