Laser cutting is one of the most efficient methods of processing sheet metal. However, its efficiency depends heavily on achieving consistent edge quality. When they don’t, the savings achieved during cutting are often lost to downstream deburring, grinding, and rework.
In most sheet metal applications, edge quality issues are process-related rather than machine-related. This guide discusses the most common laser cutting problems, their causes, and the practical techniques that yield cleaner parts with less post-processing.
The Hidden Price Tag of Poor Laser Cutting Quality
The machine’s hourly rate is only part of the cost picture. In many fabrication setups, the true expense is the labour and material waste created by poor laser cutting edge quality after the cut.
- Labor-Intensive Deburring: Manually removing laser cutting burrs is a slow and labor-intensive process. When it becomes a stage in your workflow, you effectively pay twice: once for cutting and again for post-processing. That overhead adds up quickly during a production cycle.
- Material Waste & Rejections: Poor edge geometry does not always look terrible. It can affect dimensional accuracy and create fit-up issues during assembly, leading to rejected parts and production delays.
- Compromised Aesthetics and Fit: Rough or oxidized edges create real problems for welding and powder coating. Weld joints need clean, consistent surfaces, and a coating line won’t hide bad prep work. The quality of your final product is only as good as the edges underneath.
Common Laser Cutting Defects and Their Causes
Most laser cutting defects can be traced back to a small number of out of balance process factors. The fastest way to fix it is to know the root cause.
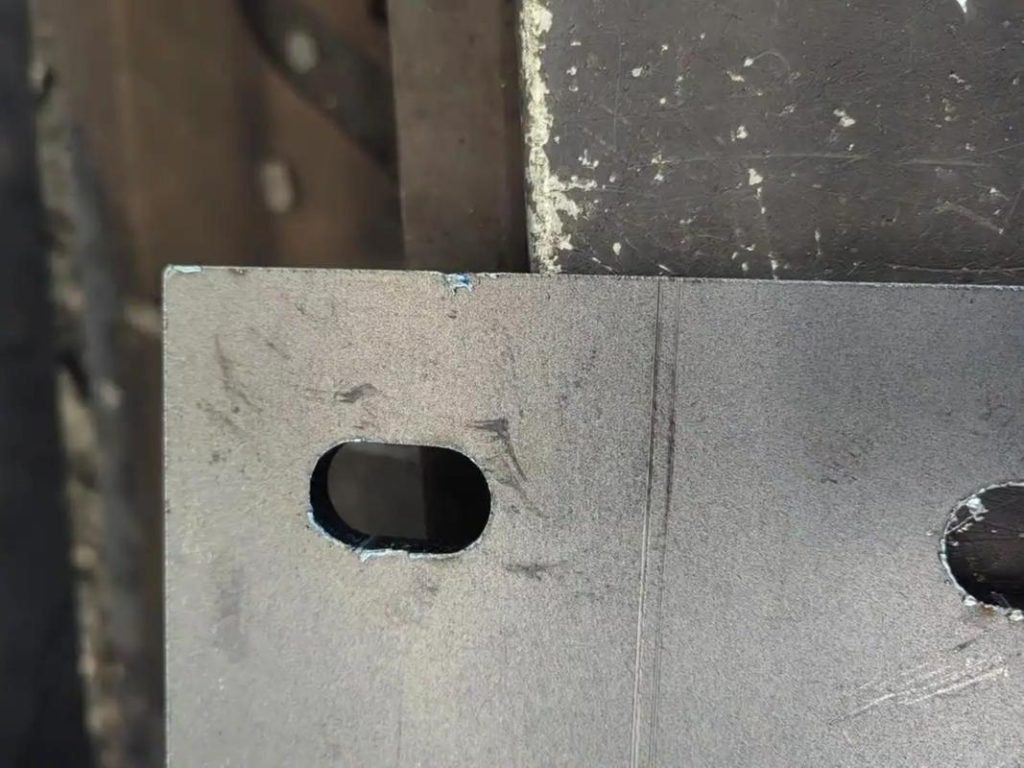
The Battle Against Dross and Burrs
Dross and burrs are two of the most prevalent complaints in metal manufacturing. They occur when molten material is not sufficiently cleared away from the cut zone and re-solidifies along the bottom edge of the part.
- Thermal Imbalance: For thicker stock, the heat buildup at the bottom of the cut zone prevents molten metal from escaping smoothly. Most often the first step is to check and adjust the focal location and power settings.
- Gas Pressure Mismatch: Assist gas is the physical agent that ejects molten material from the kerf. If there is not enough pressure the melt will not be removed and difficult burrs remain. These will have to be ground off by hand, before the parts can move forward.
Striations and Rough Surface Finishes
Striations running down the cut edge are often a sign that one or more cutting parameters need adjustment. The control of these variables will influence directly the quality of laser cutting surface finish.
- Beam Quality and Focus Stability: A contaminated lens or slightly off focal point might disperse the beam sufficiently to provide irregular, inconsistent striations. Regular lens inspection and proper configuration of focus make a measurable impact.
- Feed Rate Errors: If you cut too fast you will see very noticeable drag lines on the edge. If the cutting speed is too slow, the material will over-melt, which will increase the kerf and roughen the surface. The best speed is a window that depends on the kind and thickness of the material.
This is a brief reference to the most frequent laser cutting defects and how to fix them:
| Laser Cutting Defect | Primary Root Cause | Fix |
| Hard Burrs (Dross) | Assist gas pressure too low / Focus too high | Increase gas pressure; lower focal point |
| Rough Striations | Cutting speed too fast | Reduce feed rate; check nozzle condition |
| Large Heat-Affected Zone | Excessive heat input | Optimize power and cutting speed |
| Excessive Oxidation | Oxygen reaction too aggressive | Reduce oxygen pressure or switch to nitrogen |
4 Tips for Laser Cutting Optimization
It is much more efficient to stop defects at the source than to try to fix them later. These four areas are always the most important for improving the quality of laser cutting.
1. Focus on the Perfect Focal Position
For thicker materials it is better to set the focus point just below the top surface, rather than directly on it, so that the molten material can flow out more easily. This little tweak will dramatically reduce dross and enhance edge straightness with no hardware adjustments.
2. Mastering Assist Gas Selection
The type of gas has a greater impact on the quality of the laser cutting edge than most operators expect:
Nitrogen creates clean, oxide free edges on stainless steel and aluminium, perfect when appearance or coating adhesion is important. And oxygen is used in an exothermic reaction that improves efficiency on thick mild steel, although it leaves a slightly oxidized finish.
It’s also worth noting that carbon steel, stainless steel, aluminum, and copper alloys each require their own combination of gas type, pressure, power, and speed. What works for one material won’t necessarily work for another.
3. Finding the “Goldilocks” Cutting Speed
The fastest feed rate is not necessarily the best. Laser cutting optimization usually involves speed trials on sample cuts to determine the rate that gives the cleanest edge, not the fastest cycle time. In some materials a slight reduction of speed will alleviate the problem of striation altogether.
4. Nozzle Condition and Centering
If the nozzle is worn or off-center, it will disturb the flow of the assist gas. This creates turbulence and causes uneven edges and irregular kerf width. One of the lowest effort, greatest return maintenance practices for any laser cutting operation is to inspect and change the nozzle on a regular basis.
Designing Parts for Flawless Laser Cutting
Process settings matter, but so does part design. A few small adjustments at the CAD stage can prevent a surprising amount of finishing work later on.
- Avoid Sharp Internal Corners: Small fillets at internal corners prevent the laser from lingering in one area concentrating heat and resulting in localized over-melting that is difficult to repair after cutting.
- Respect the Hole-to-Thickness Ratio: As a general rule, the hole diameter should be at least equal to the material thickness. Thicker stock with smaller holes tend to blow out and have bad edge geometry.
- Proper Spacing (Webbing): Cutting features too close together will cause heat to build up and deform the surrounding sheet. Leave enough material between cut features to maintain part flatness and dimensional accuracy.
Building a Cost-Efficient Laser Cutting Workflow
Reducing secondary finishing is often the fastest way to lower the true cost of laser-cut parts. By optimizing cutting parameters, assist gas selection, and part design, manufacturers can achieve cleaner edges, higher throughput, and more predictable production costs.
JTR’s laser cutting service starts with getting the process correct so parts come ready for the next stage, not the deburring bench. If you’re working through edge quality challenges or looking to streamline your sheet metal workflow, contact us to discuss your project.